Legacy Update Instructions
These instructions are only for users who have replaced the old eye modules and the face module (where the PCB was visible) with the new version in which the LEDs and PCB are located behind the plastic cover.
Since the new version adds an additional plastic layer that the IR light has to pass through, the LED output power must be increased. This is done with the update described below.
Please follow these instructions only after you have replaced the eye modules and the face module.
Prerequisites
- The tool only works in Chromium-based browsers. I tested it with Brave and Chrome. Firefox, Safari, and other non-Chromium browsers will not work.
- You may encounter bugs while using the tool. If that happens, simply reload the page and reconnect.
- Follow the instructions EXACTLY, DO NOT use any other functions the website offers!
- 1
Open the Tool and Connect
Open the web-based upgrade tool and connect to the first camera.
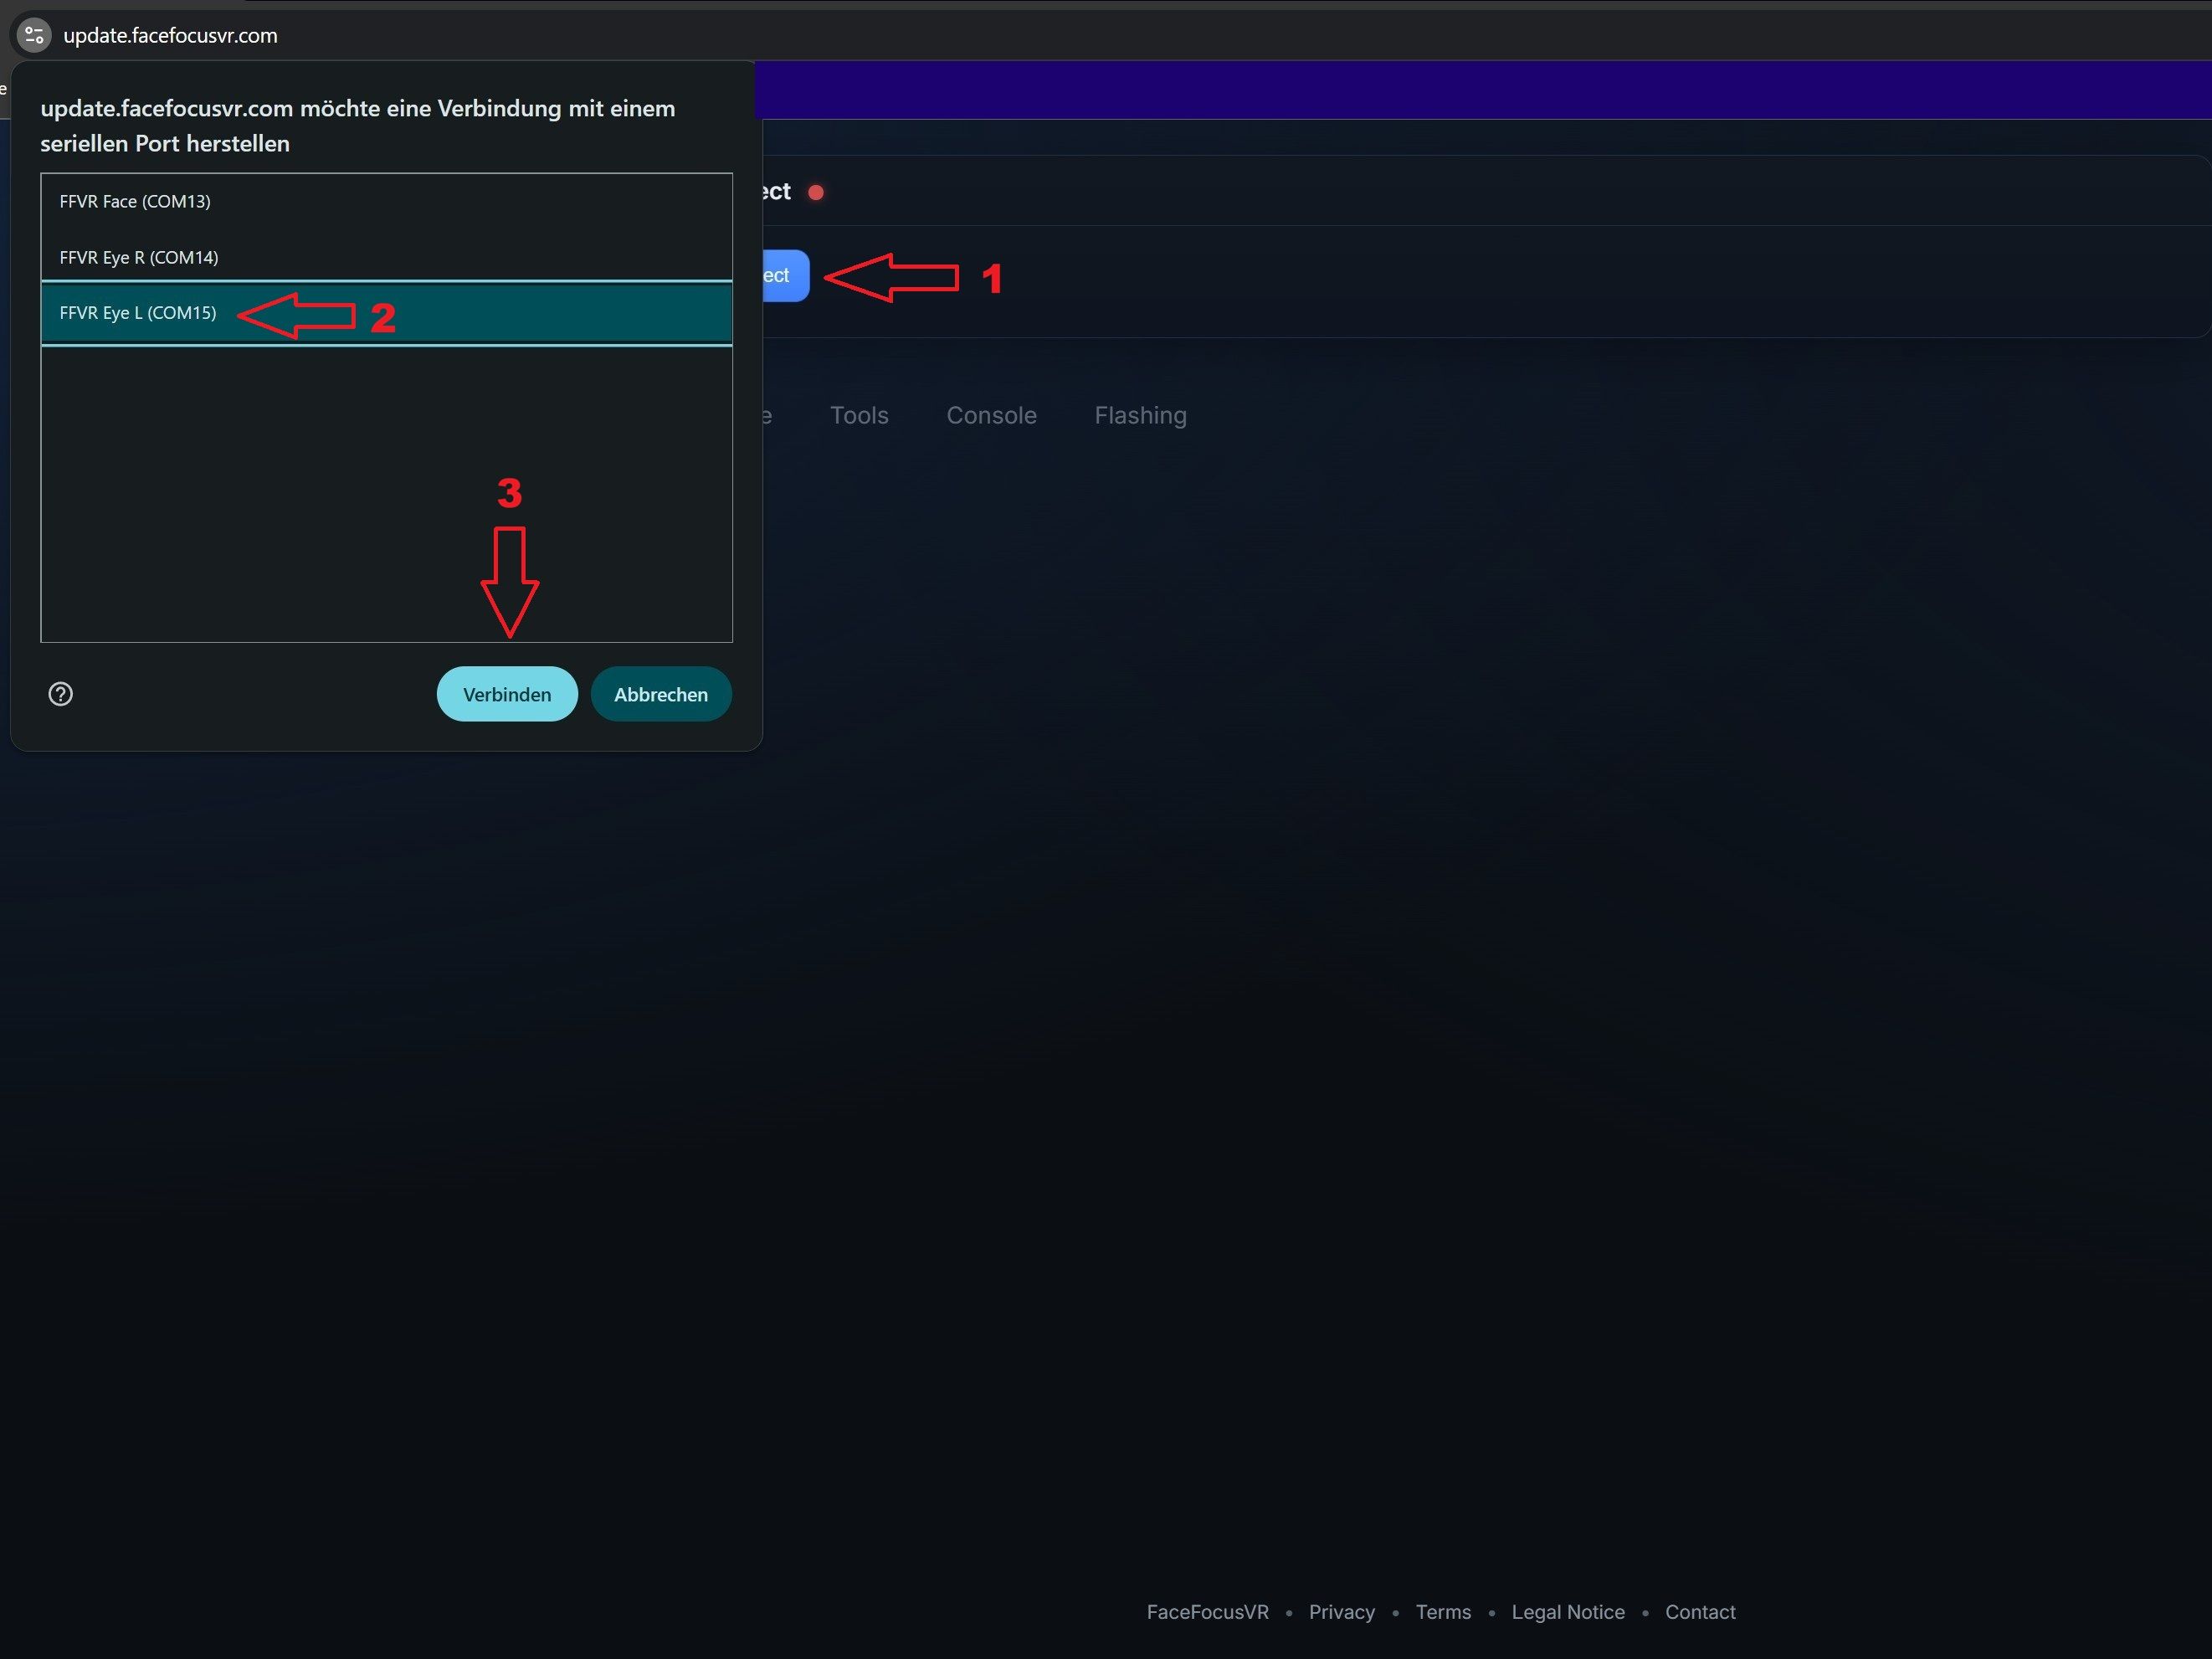
- Open the web-based upgrade tool: https://legacyupdate.facefocusvr.com using a Chromium-based browser (e.g. Chrome).
- Click "Connect", select the camera you want to upgrade (start with Eye L), and then click "Connect" again.
- 2
Enter Boot Mode
Put the camera into boot mode so it can accept new firmware.
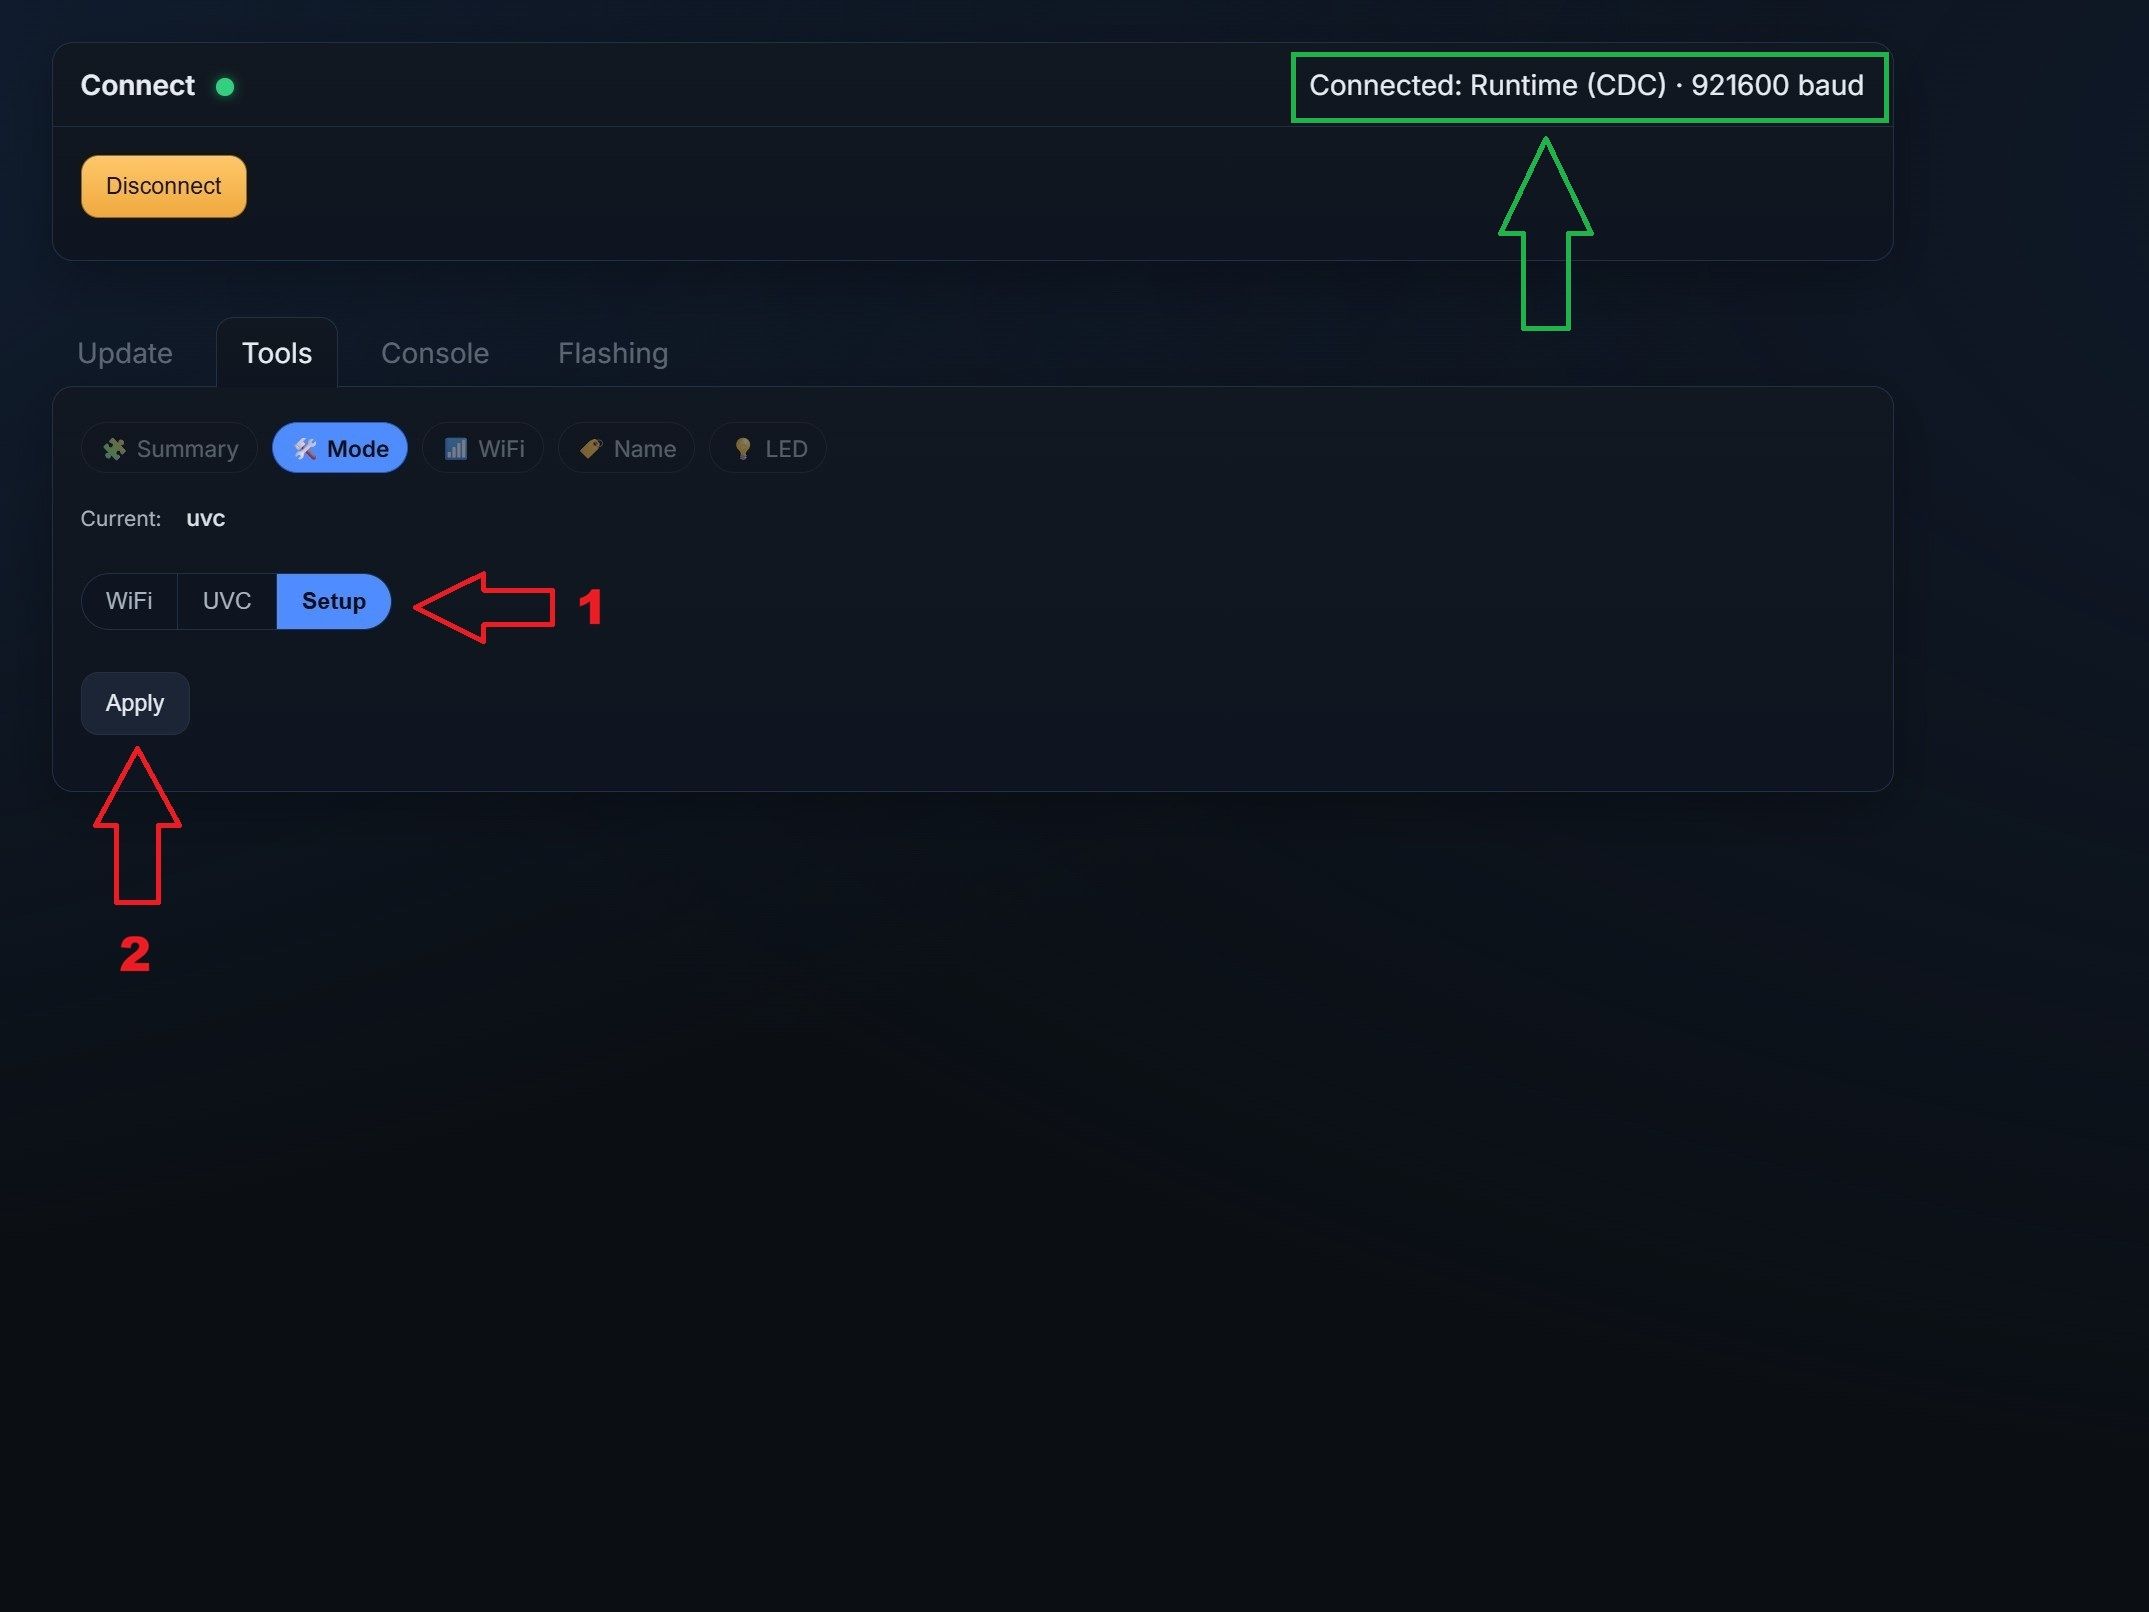
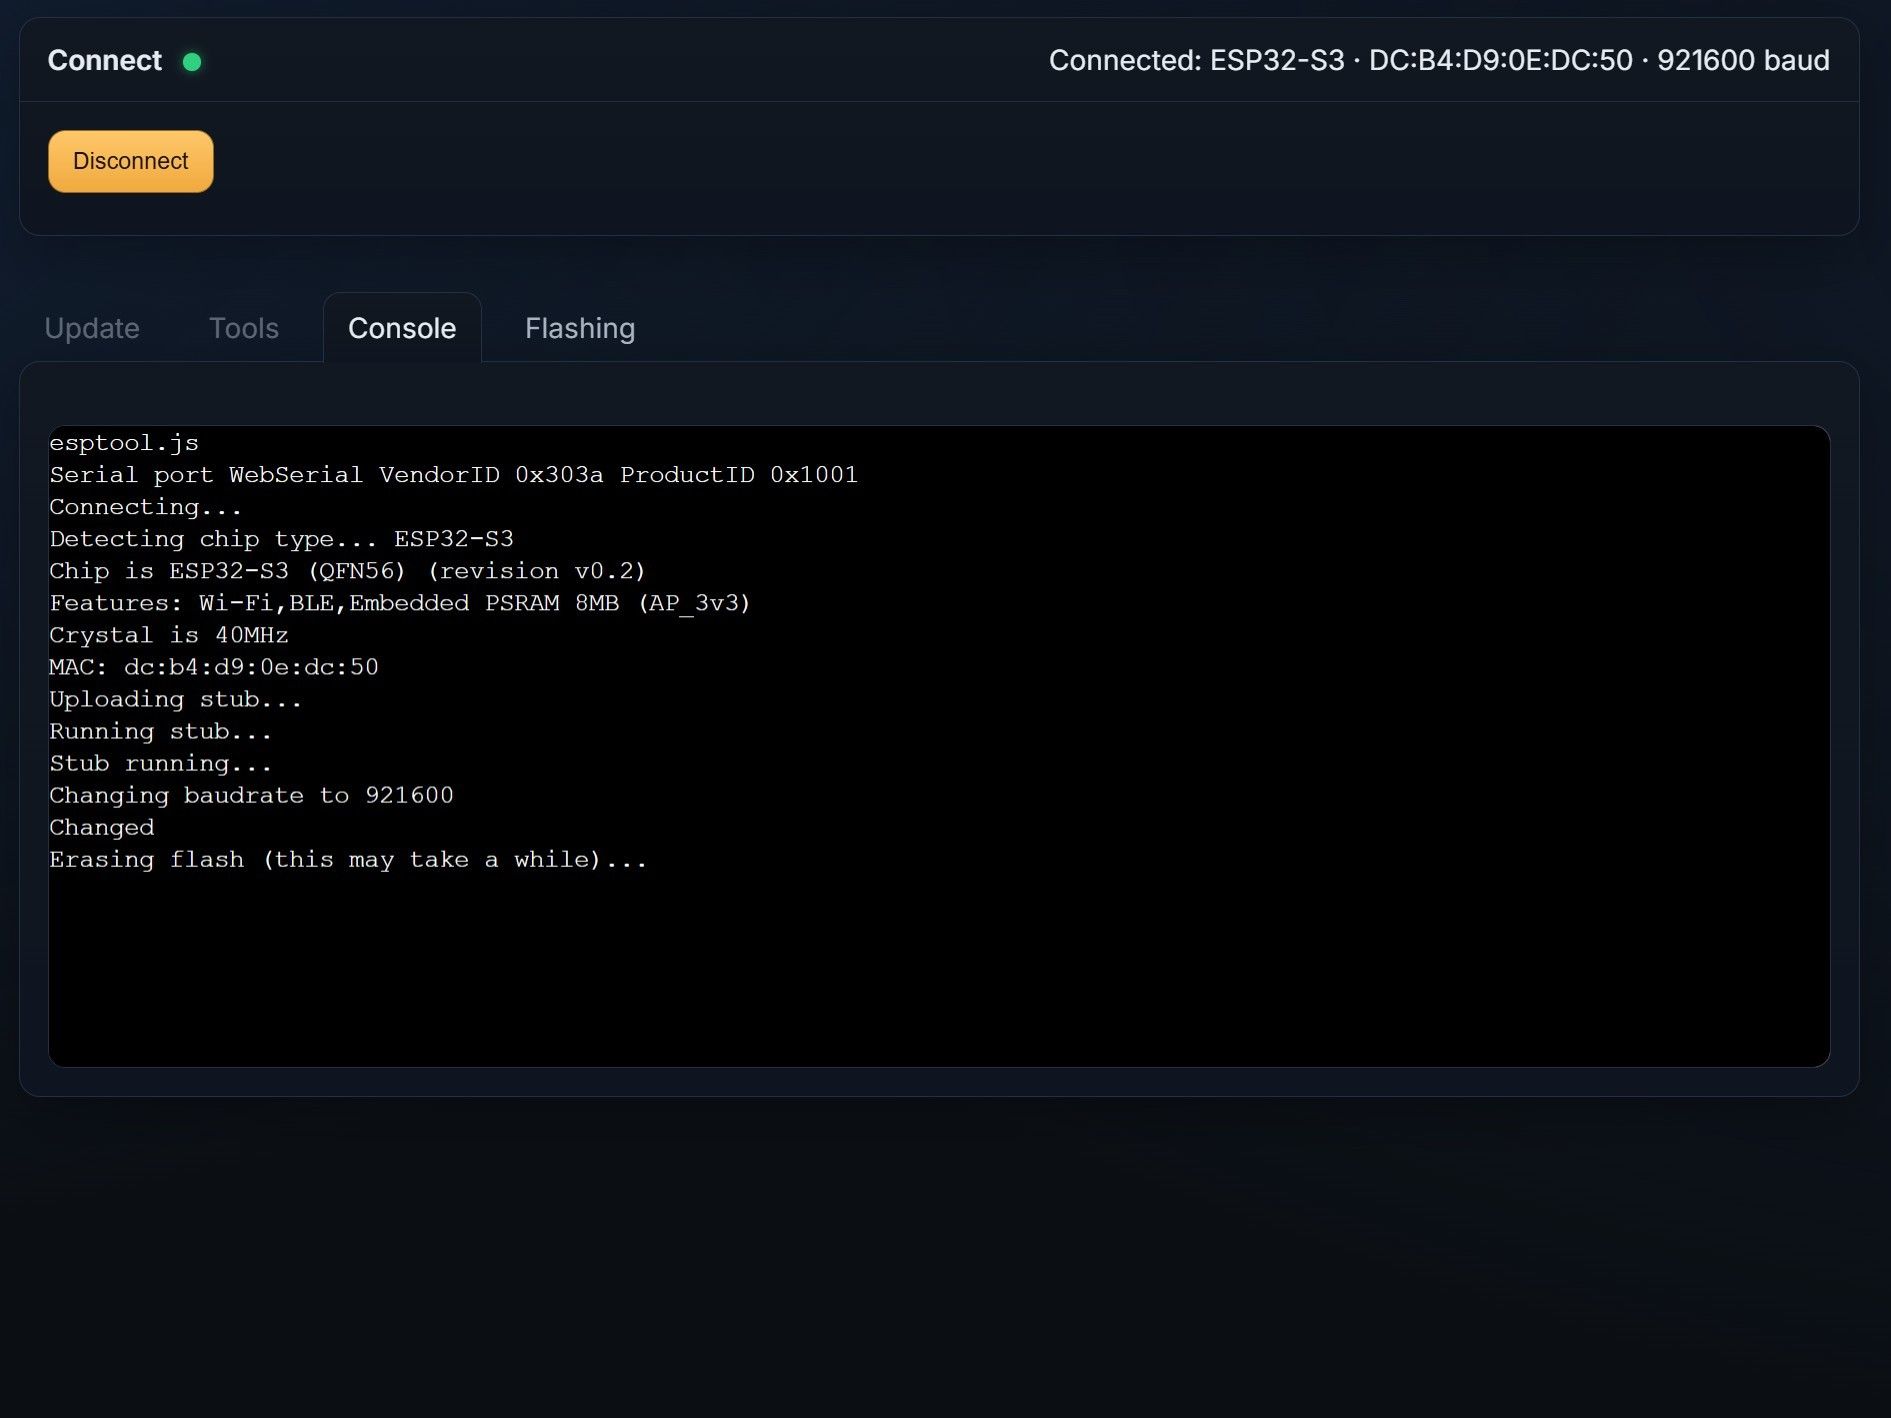
 1 / 2
1 / 2- In the top right corner, it should now say "Connected: Runtime...".
- To update the firmware, we need to put the camera into boot mode so it can accept new firmware.
- The tool should have automatically preselected the "Mode" tab. Select "Setup".
- Click "Apply".
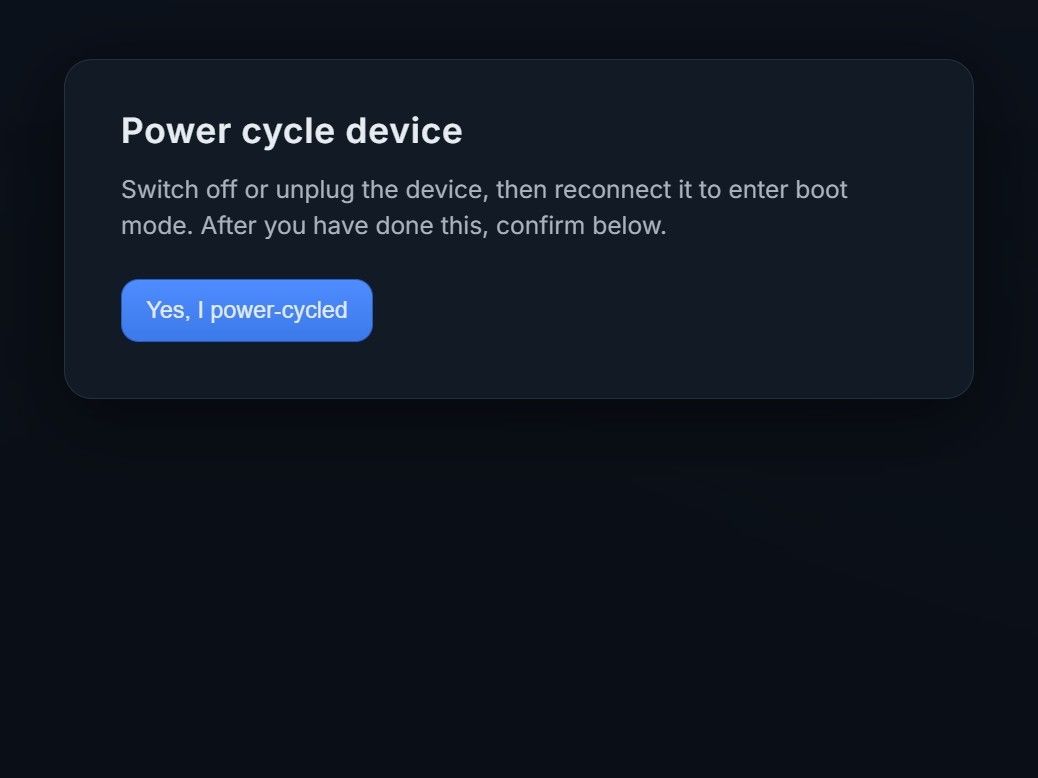
- After that, a popup will inform you to power cycle the device. Simply use the front button to turn it off, wait 5 seconds, and then turn it back on.
- Now press "Yes, I power-cycled."
- 3
Reconnect in Boot Mode
Connect to the camera again, now in boot mode.
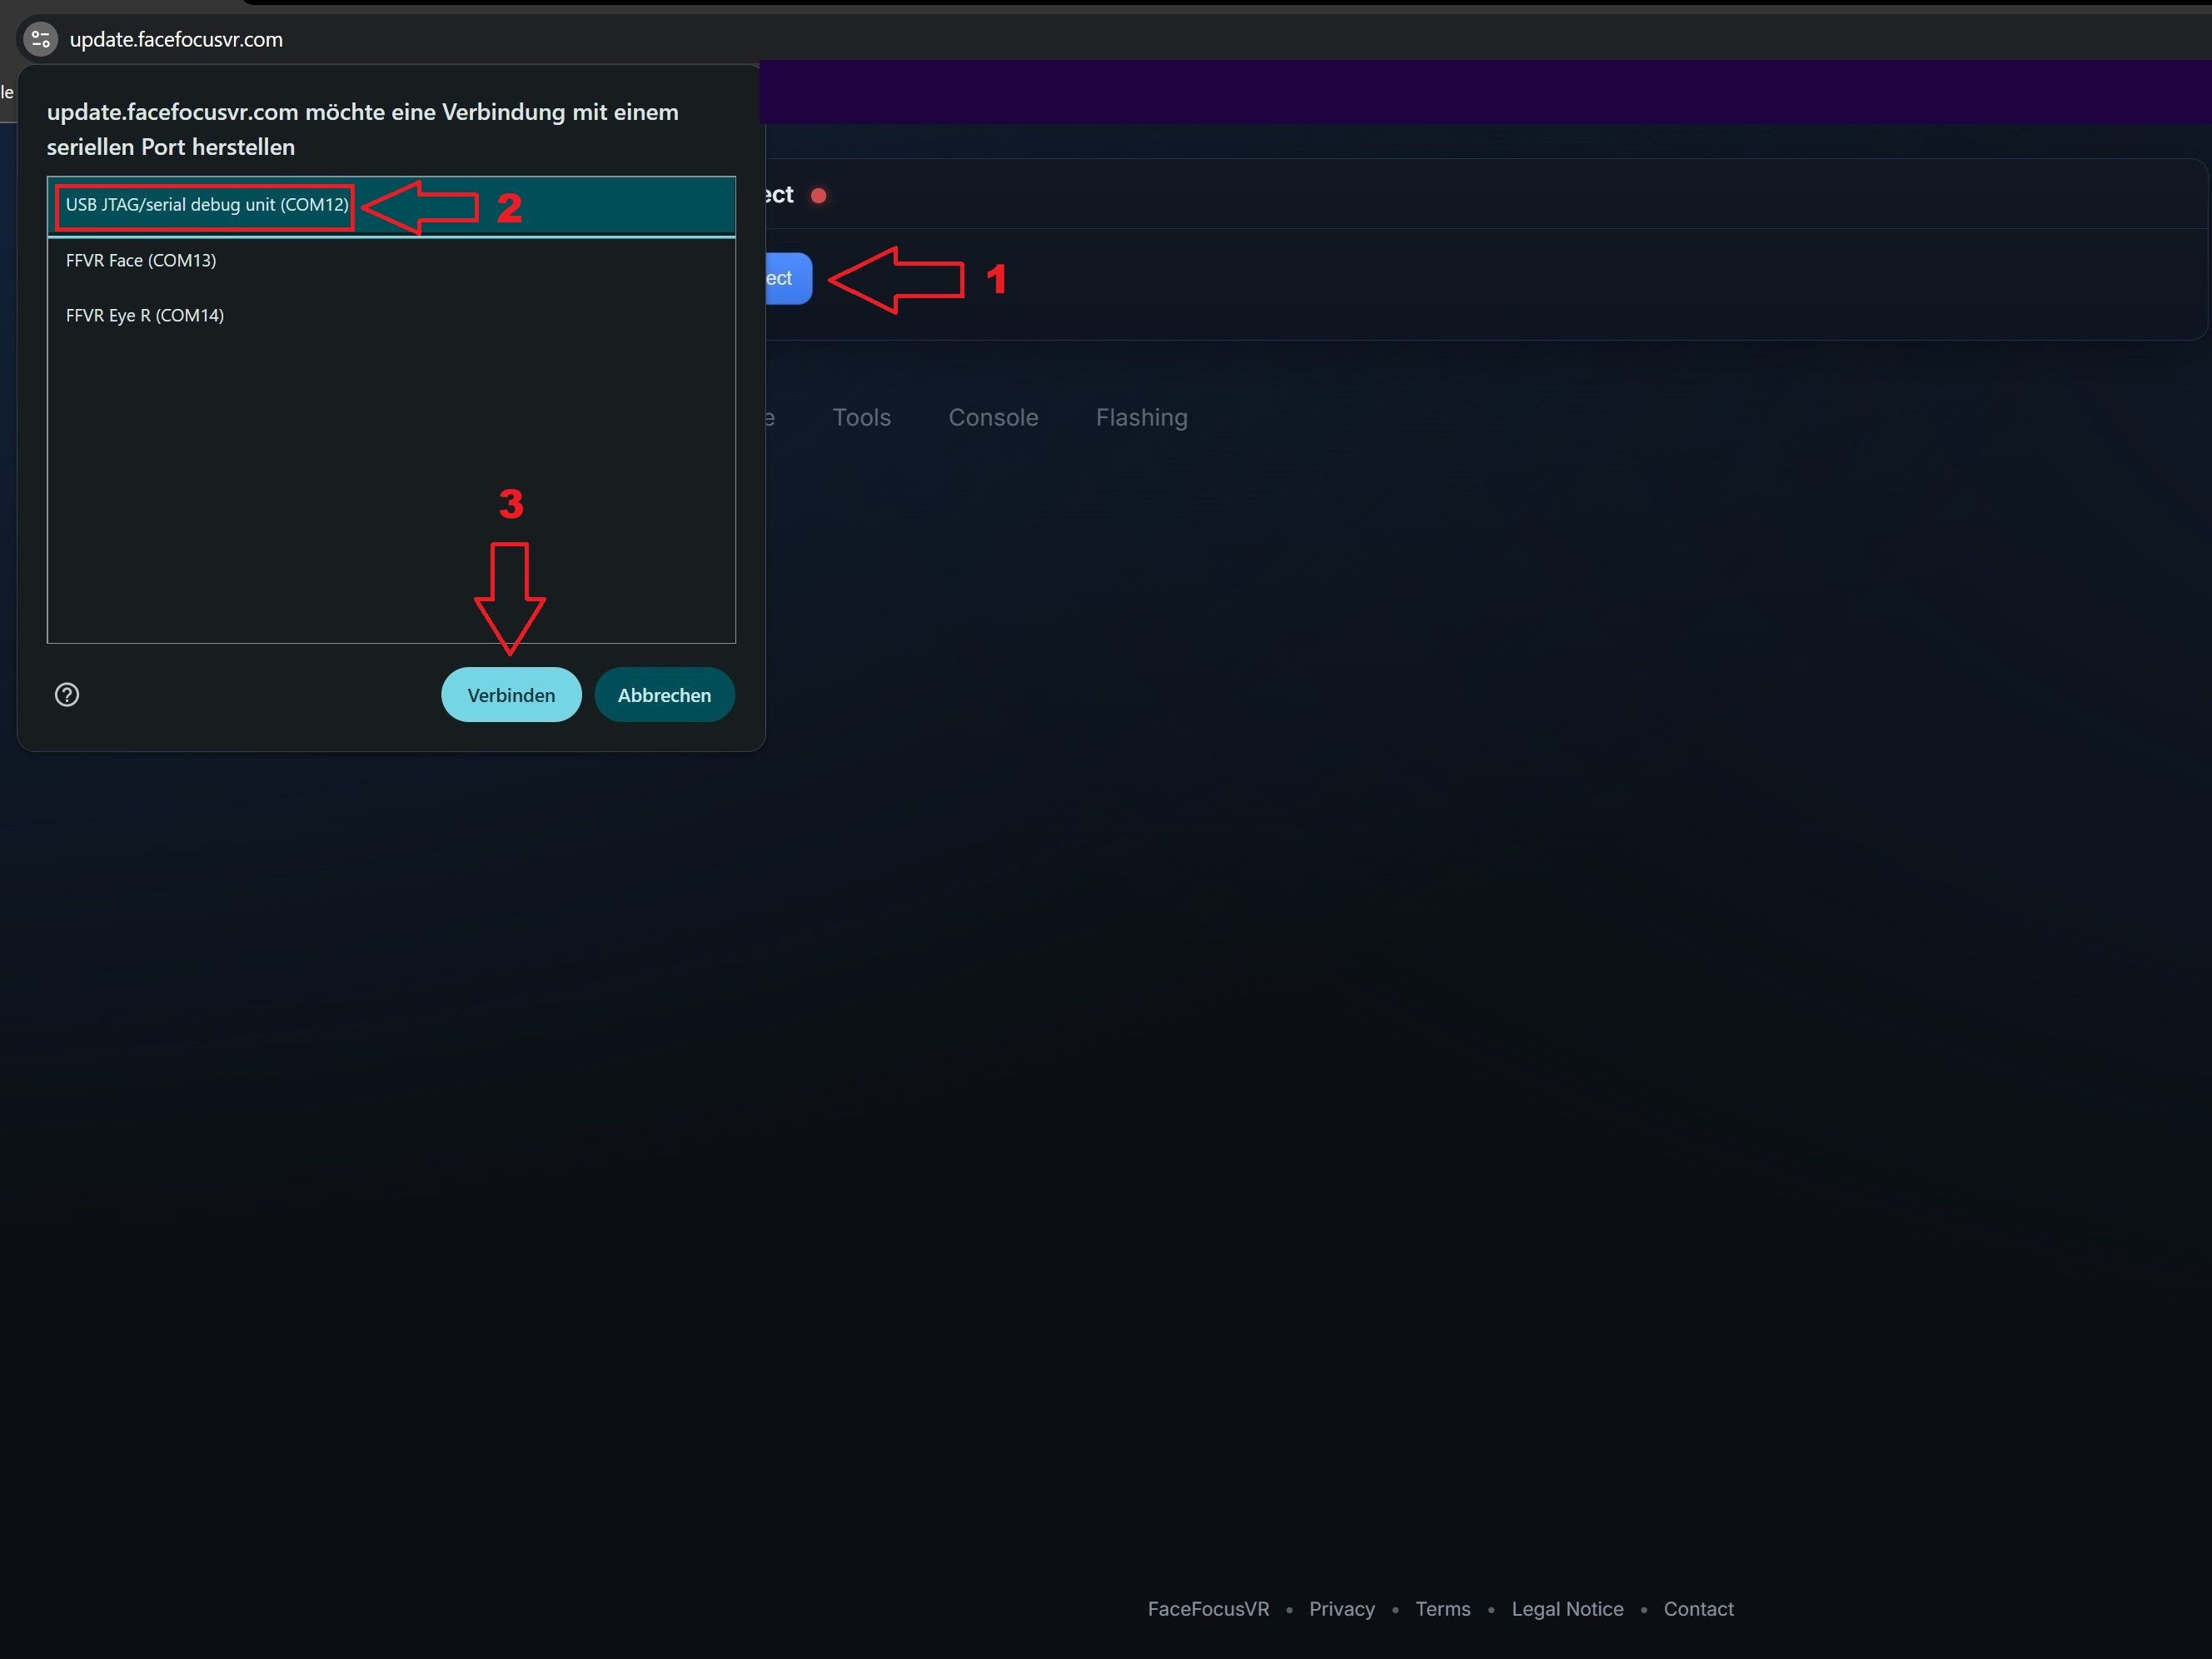
- Click "Connect".
- You should now see a new device in addition to the two previous ones. It will have a generic name (USB/JTAG...). That is the camera you just put into boot mode.
- Select it and click on "Connect".
- 4
Flash Firmware
Select and flash the correct firmware for the connected camera.

 1 / 4
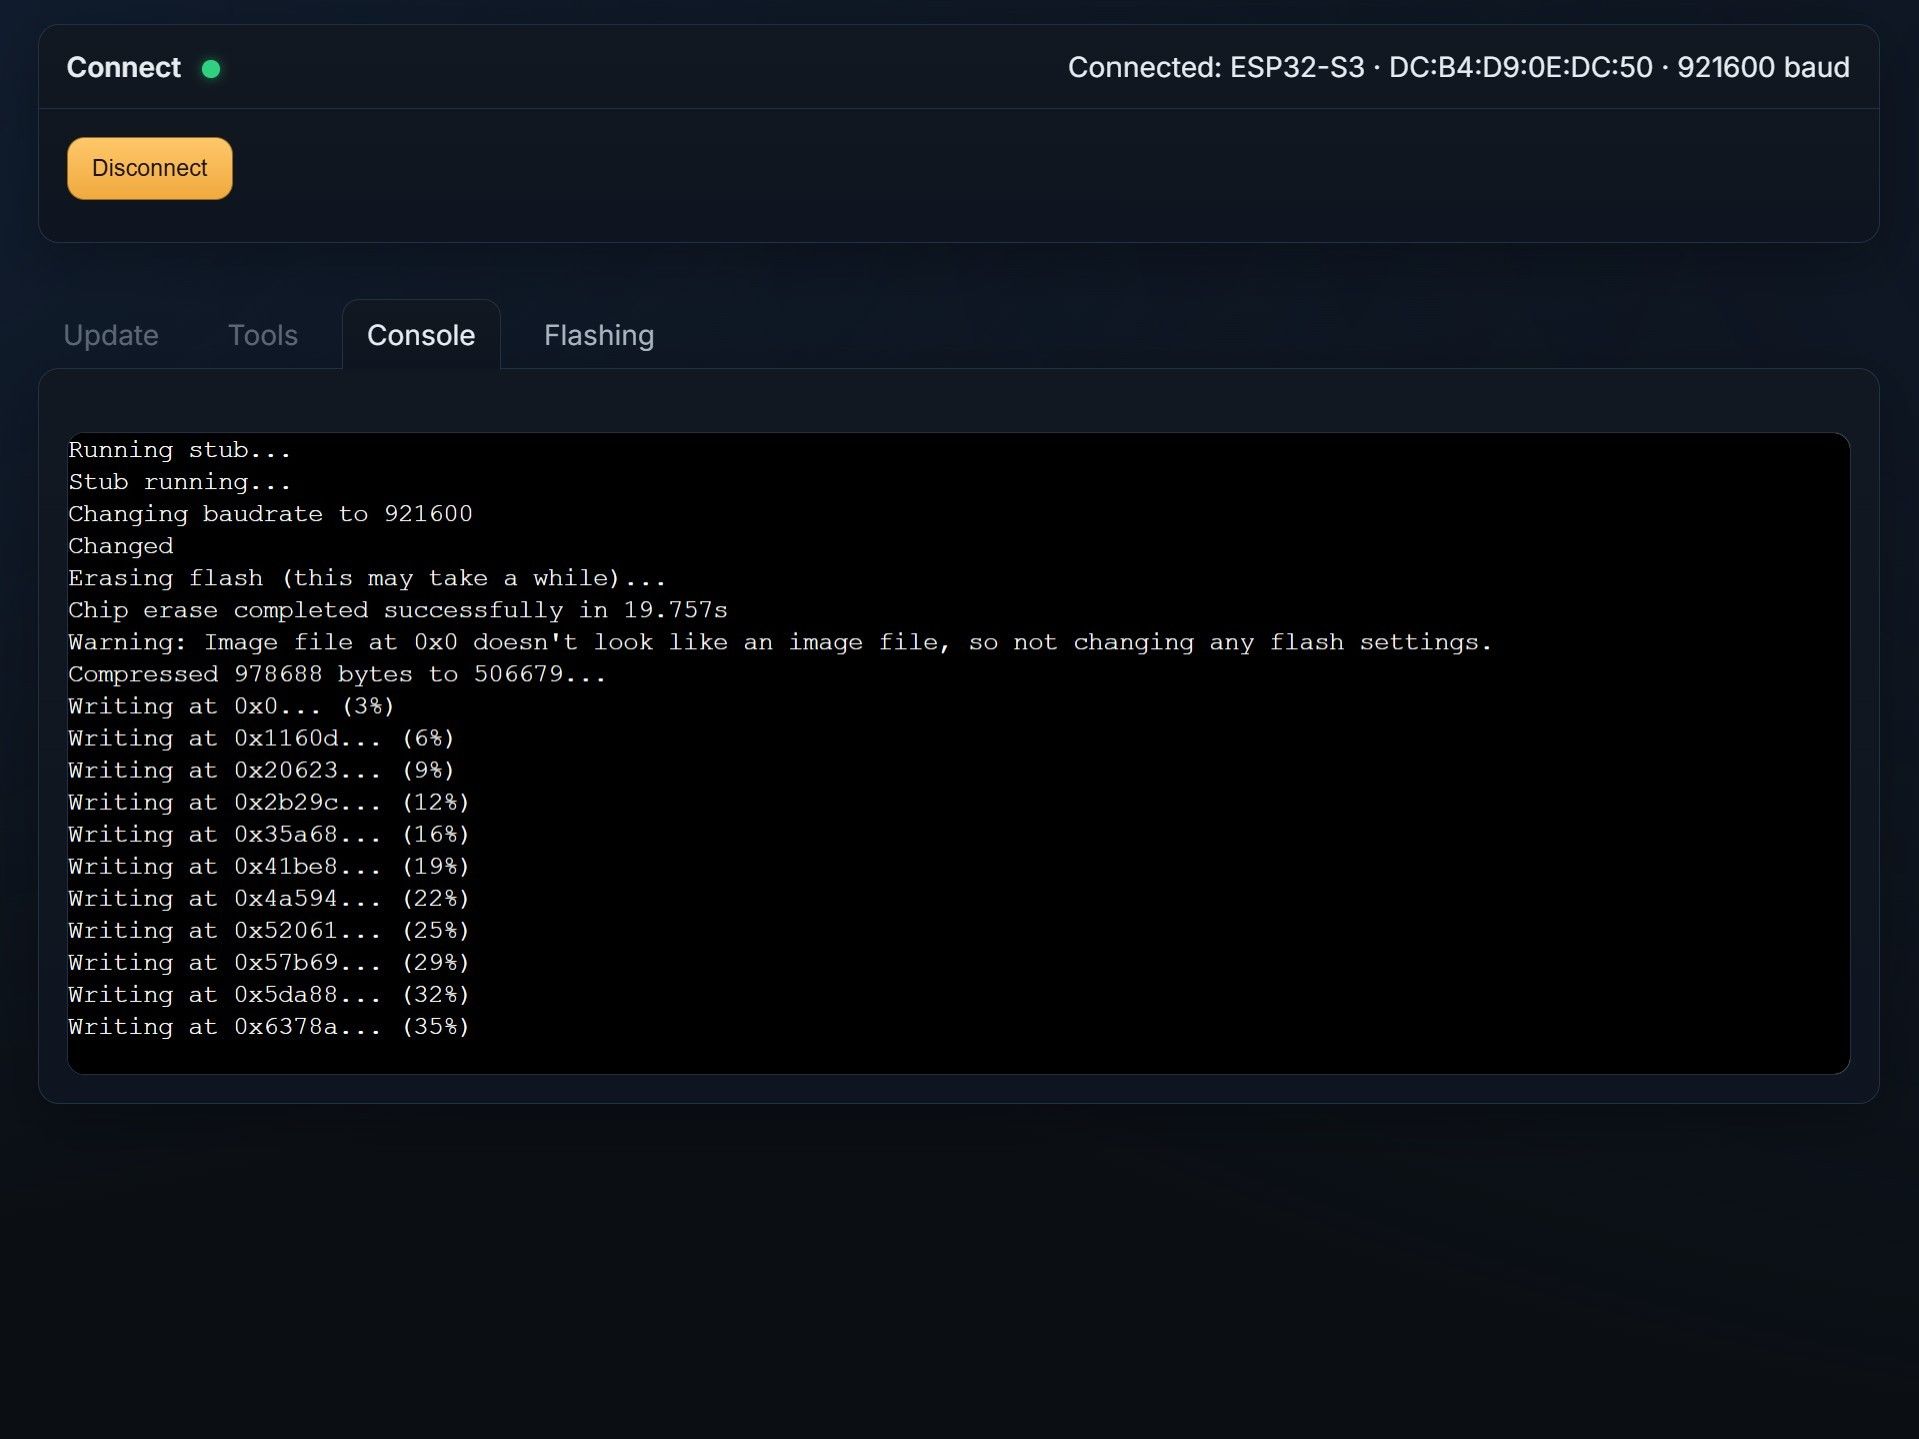
1 / 4- In the top right corner, it should now say "Connected: ESP32-S3...", which indicates that you have successfully entered boot mode.
- Open the "Select Firmware..." dropdown.
- Select the correct firmware. The firmware depends on the device you selected during the first step. If you chose "Eye L", also select the Eye L firmware. If you chose "Face", select the Face firmware.
- After selecting the correct firmware, click "Flash".
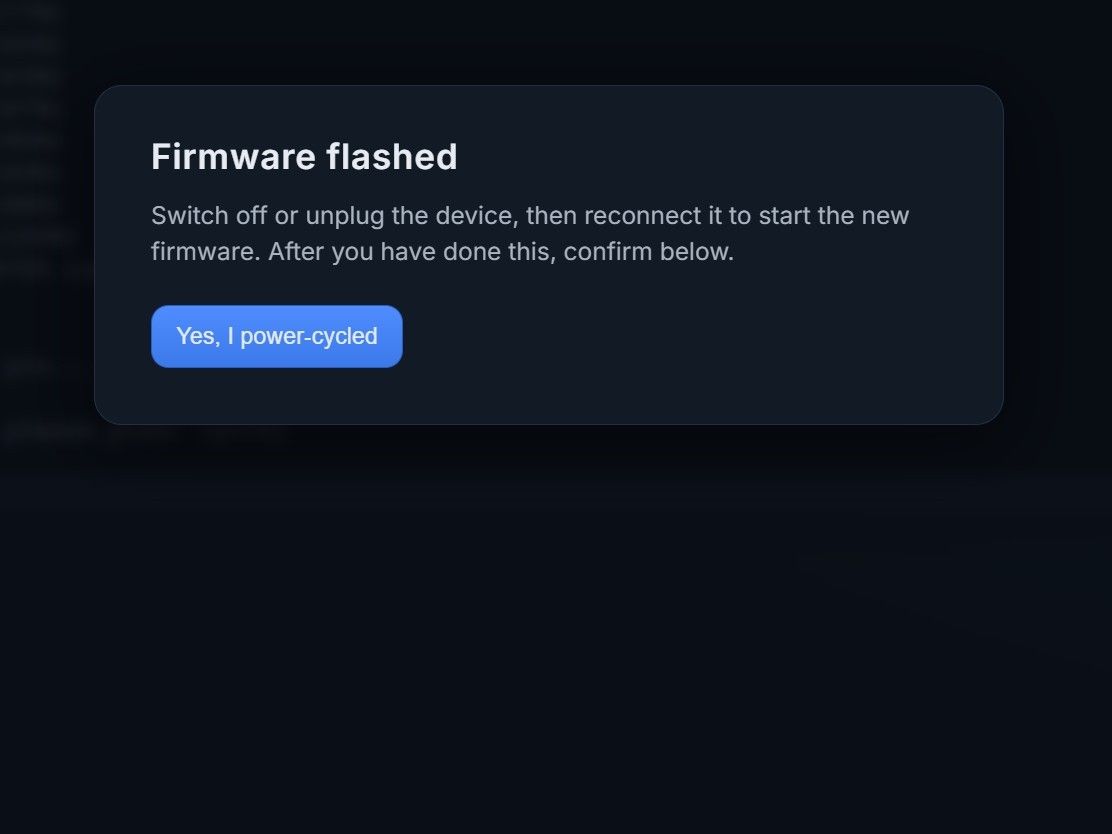
- The console should now pop up. Just wait until the process is fully completed (roughly 30 to 60 seconds) and a popup appears confirming that the firmware was successfully flashed.
- Finally, restart the board again and confirm the message.
-
Repeat for Remaining Cameras
Update the other eye camera and the face camera using the same process.
Now repeat the same steps with the camera for the other eye and for the face, and make sure to select the correct firmware for each device accordingly.